Loading interactive content…
The Email Management is available to users or groups of users with Email Management security settings enabled. It allows administrators to view and manage imported emails from a centralised Inbox, and offers a Trash menu to send unwanted emails to the Trash bin.
Inbox
The Inbox allows administrators to view and manage a filtered list of imported emails.
From the Email Management Inbox, Admin staff can:
-
View the received email message content
-
Assign unassigned emails to bookings, agents and/or suppliers when the import process has been unable to automatically assign them.
-
Unassign (or unlink) assigned emails from bookings, agents or suppliers.
-
Forward messages to another email account.
-
Send Emails to Trash.
View Email
The contents of an email can be viewed from the Email Management Inbox, and Trash screens. Simply highlight the email and select view. A number of tasks can be preformed from within the Email view screen including:
View an Email Message
-
From the Home menu, select
 Home > Operations > Booking Operations > Email Management > Inbox.
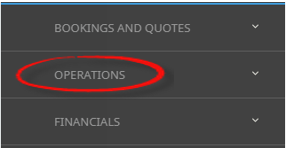
- Click the Home Menu to expand it:

- Click the Operations menu option to expand it:

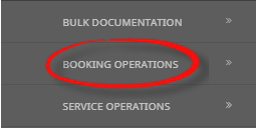
- Click Booking Operations menu option to expand it:

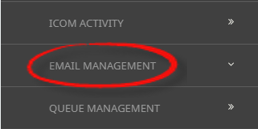
- Click Email Management to open the Email Management screen:

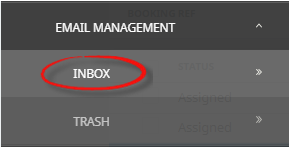
- Click Inbox to open the Email Inbox screen:

- Click the Home Menu to expand it:
-
A list of emails displays. Expand theEmail Filter to filter emails by Email Account, Date, Agent, Supplier, Booking Reference, Email Type or Email Status.

-
Highlight the Email line and selectView.

-
ClickExit to close.


Assign Emails
The Email Management Email Status Filters are used to identify Unassigned or Error email messages. An email marked as unassigned indicates that the system could not find matching data in the subject line or contact information, resulting in it not being matched (or unassigned) during the import process.
There are two procedures for assigning an email:
Existing Booking - Emails are assigned by highlighting the email line, and selecting the View button, to view the email. The Email Type selected provides search field criteria to locate the booking, agent or supplier.
There are 6 Email Types, each selection enables different search fields:
-
Booking - assigns the email to a booking
-
Booking Agent - assigns the email to a booking and the agent
-
Booking Supplier - assigns the email to a booking and supplier
-
General - the email has not been assigned to an agent, supplier or booking
-
General Agent - assigns the email to an agent only
-
General Supplier - assigns the email to a supplier only
If the Booking Name is known you can enter it in the Booking field, or use the Search button to open the full Booking Search.
If the Agent or Supplier are known you can enter their name in the Agent or Supplier fields, or use the Search button to open the full Debtor or Creditor Search. If the email type is a Booking Agent or Booking Supplier message with a booking selected, the Debtor and Creditor search function is disabled and the dropdown list of options under Agent and the Supplier fields are restricted to those that appear in the booking.
Assign Email to Existing Booking
-
From the Home menu, selectHome > Operations > Booking Operations > Email Management > Inbox.
- Click the Home Menu to expand it:
- Click the Operations menu option to expand it:
- Click Booking Operations menu option to expand it:
- Click Email Management to open the Email Management screen:
- Click Inbox to open the Email Inbox screen:
- Click the Home Menu to expand it:
-
>A list of emails displays. Expand theEmail Filter to filter emails by Email Account, Date (from and to), Agent, Supplier, Booking Reference, Email Type or Email Status.
NOTE: To view unassigned emails, select the 'Unassigned' Email Status in the Email Filter.
-
Highlight the Unassigned Email line and selectView.

-
TheEmail screen opens, select the Email Type.
For more information on field selections see the Email Type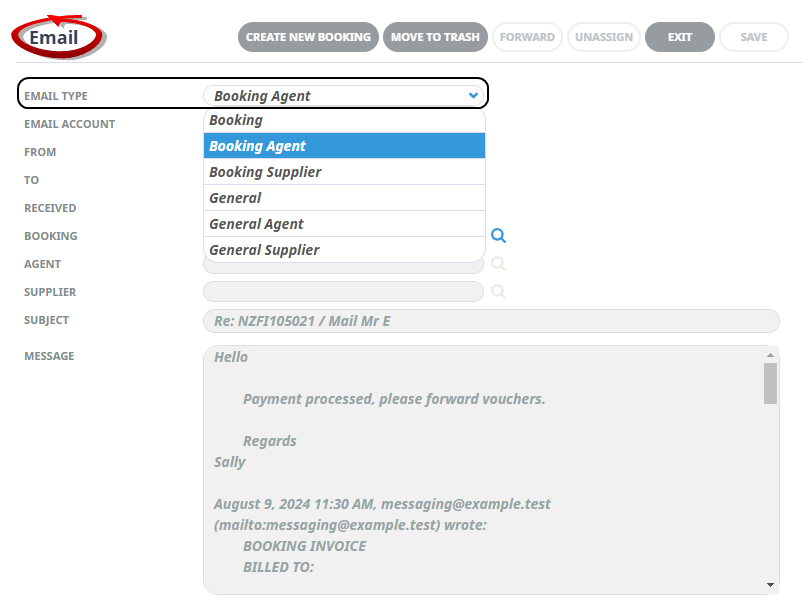
-
Enter the Booking Name (if known) and click the corresponding Search icon. Or,
-
Use the full Booking Search, select theSearch icon, to open the Booking Search screen.
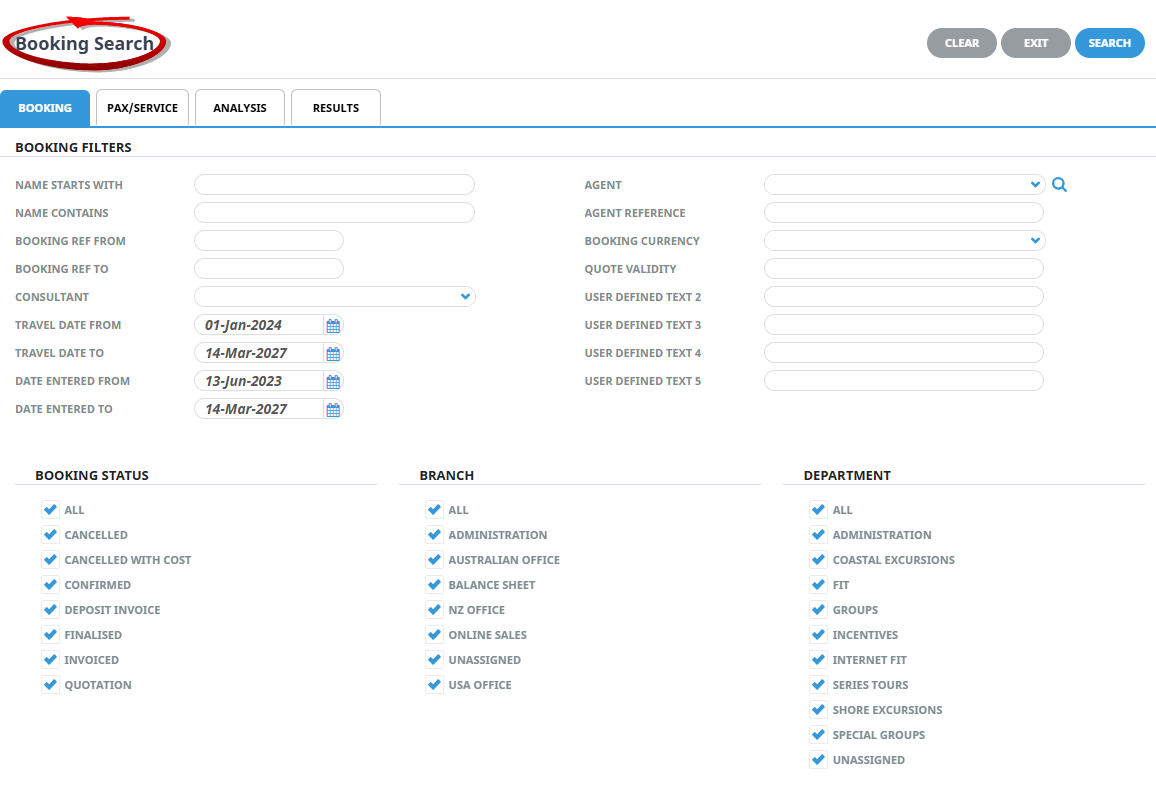
-
ClickSearch.

-
-
TheResults screen opens, click the Booking you want to Assign the email to.

-
In this example; Email Type - Booking Agent was selected, the Booking and Agent fields now have the Booking Reference, Booking Name and Agent inserted from the selected booking.
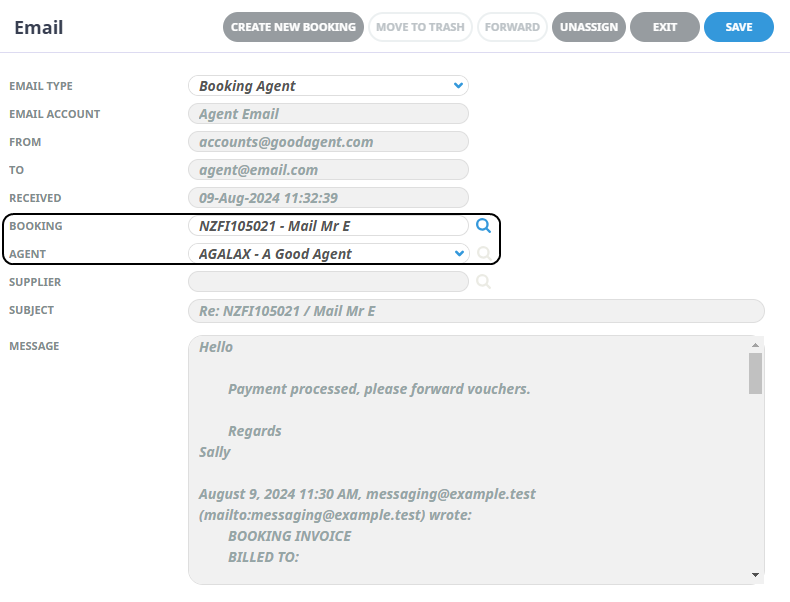
-
ClickSave to keep the changes.

-
-
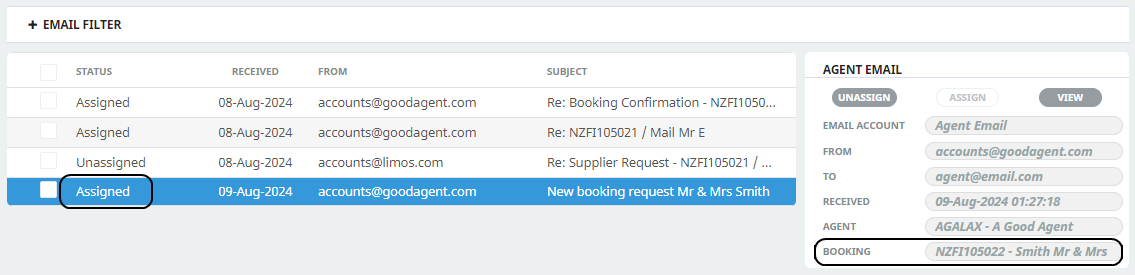
The Email Status shows the email isAssigned to the selected booking.
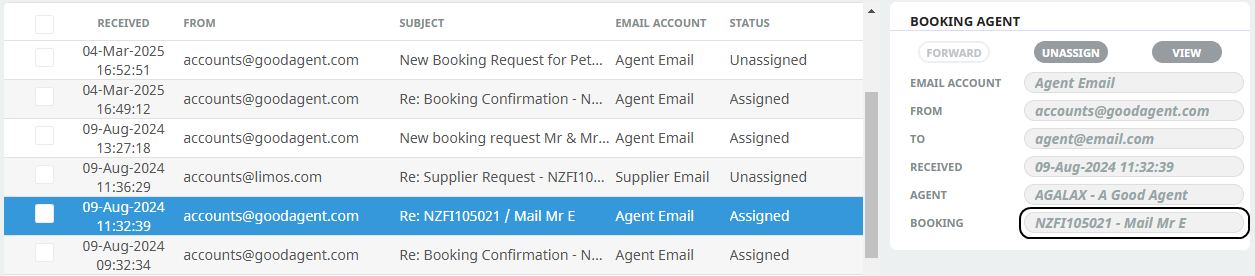
-
Continue to process emails, to Exit close the Booking Operations browser tab, or select a new menu option.
Assign Email to New Booking
Create New Booking - Unassigned emails with no previous booking history can be assigned to a new booking. Simply view the email and select the Create New Booking button, complete the Booking Details and the email will automatically assign to the new booking.
-
From the Home menu, selectHome > Operations > Booking Operations > Email Management > Inbox.
- Click the Home Menu to expand it:
- Click the Operations menu option to expand it:
- Click Booking Operations menu option to expand it:
- Click Email Management to open the Email Management screen:
- Click Inbox to open the Email Inbox screen:
- Click the Home Menu to expand it:
-
A list of emails displays. Expand theEmail Filter to filter emails by Email Account, Date, Agent, Supplier, Booking Reference, Email Type or Email Status.
NOTE: To view unassigned emails, select the 'Unassigned' Email Status in the Email Filter.
-
Highlight the Unassigned Email line and selectView.
-
TheEmail screen opens, select an Email Type: Booking or Booking Agent to enable the Create New Booking button.

-
ClickCreate New Booking to create a booking.

-
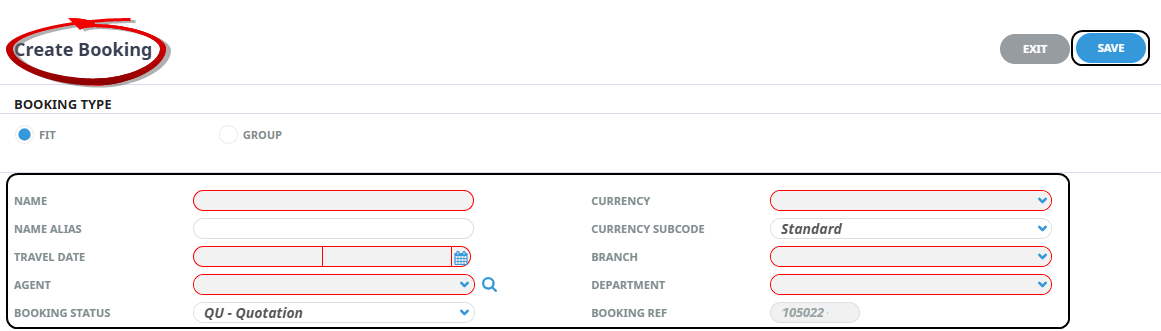
TheCreate Booking screen opens, select FITs or Groups to create an FIT booking or a Group Booking, enter the New Booking Details, and click Save.
-
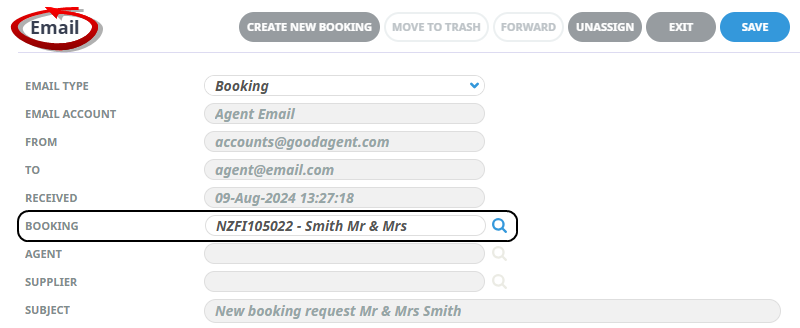
TheEmail screen now displays the new Booking Reference and Booking Name in the Booking field.
-
ClickSave to keep the changes.
-
The email Status shows the email isAssigned to the new booking.
-
Continue to process emails, to Exit close the Booking Operations browser tab, or select a new menu option.
Unassign Emails
Emails can be unassigned if they were assigned in error. There are two methods to unassign an Email, simply highlight the email and select Unassign, or view the email and select unassign. The Email can then be re-assigned to a booking following the assign email to booking procedure, moved to trash, or forwarded to an external email account.
Unassign Email from Booking
-
From the Home menu, selectHome > Operations > Booking Operations > Email Management > Inbox.
- Click the Home Menu to expand it:
- Click the Operations menu option to expand it:
- Click Booking Operations menu option to expand it:
- Click Email Management to open the Email Management screen:
- Click Inbox to open the Email Inbox screen:
- Click the Home Menu to expand it:
-
A list of emails displays. Expand theEmail Filter to filter emails by Email Account, Date, Agent, Supplier, Booking Reference, Email Type or Email Status.
- There are two methods to unassign an email, from the Main Inbox Page (a), or from the Email view (b).
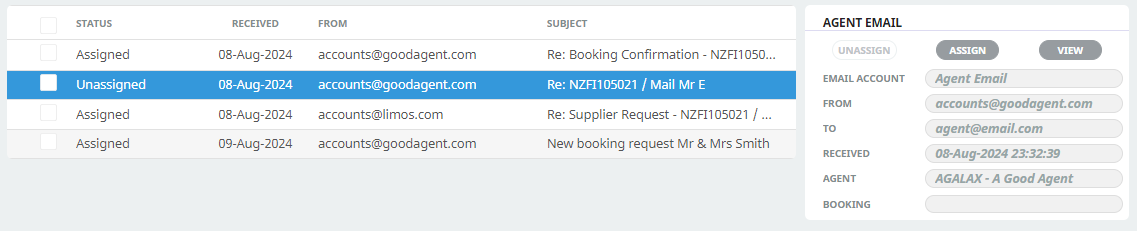
- From the Main Inbox Page, highlight the Assigned Email line and selectUnassign.
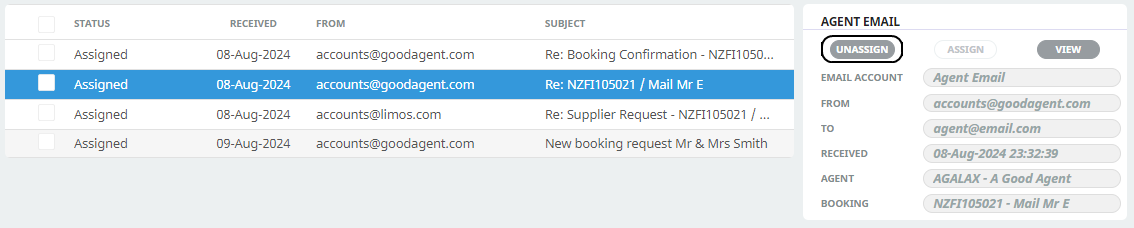
Or highlight the Assigned Email line and select View, and then click Unassign.
-
A confirmation dialog displays. Unassigning this email will remove it from any Booking/Supplier/Agent, select Yes to confirm, or No to return to the Inbox.
-
IfYes is selected, the email re-displays in the Inbox with an Unassigned status.
NOTE: Filters may need to be adjusted to view unassigned emails.
-
The email can now be assigned, by following the procedure. Assign Email to Existing Booking or Assign Email to New Booking
Move Emails to Trash
Emails are not deleted, instead they are moved to Trash. There are two methods to moving emails to Trash, a bulk selection from the Email Management page allows multiple emails to be moved at once, or an individual email selection via the view email screen.
-
From the Home menu, selectHome > Operations > Booking Operations > Email Management > Inbox.
- Click the Home Menu to expand it:
- Click the Operations menu option to expand it:
- Click Booking Operations menu option to expand it:
- Click Email Management to open the Email Management screen:
- Click Inbox to open the Email Inbox screen:
- Click the Home Menu to expand it:
-
A list of emails displays. Expand theEmail Filter to filter emails by Email Account, Date, Agent, Supplier, Booking Reference, Email Type or Email Status.
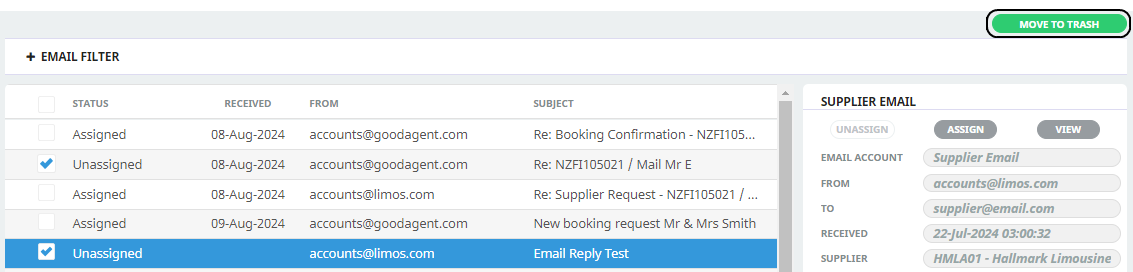
- There are two methods the first is a bulk move of emails (a), the second is from the Email view (b)..
- Check the box next to the Email(s) and selectMove To Trash.
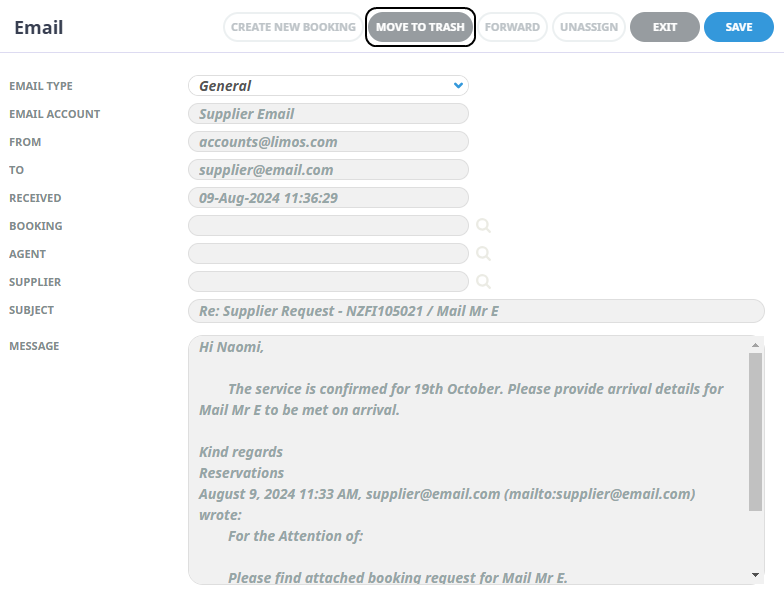
- Highlight the email line, and selectView.

- SelectMove To Trash.
-
The emails are moved to Trash.
Forwarding an Email
Emails are not deleted, instead they are moved to the Trash menu list.
Forward an Email
-
From the Home menu, selectHome > Operations > Booking Operations > Email Management > Inbox.
- Click the Home Menu to expand it:
- Click the Operations menu option to expand it:
- Click Booking Operations menu option to expand it:
- Click Email Management to open the Email Management screen:
- Click Inbox to open the Email Inbox screen:
- Click the Home Menu to expand it:
-
A list of emails displays. Expand theEmail Filter to filter emails by Email Account, Date, Agent, Supplier, Booking Reference, Email Type or Email Status.
-
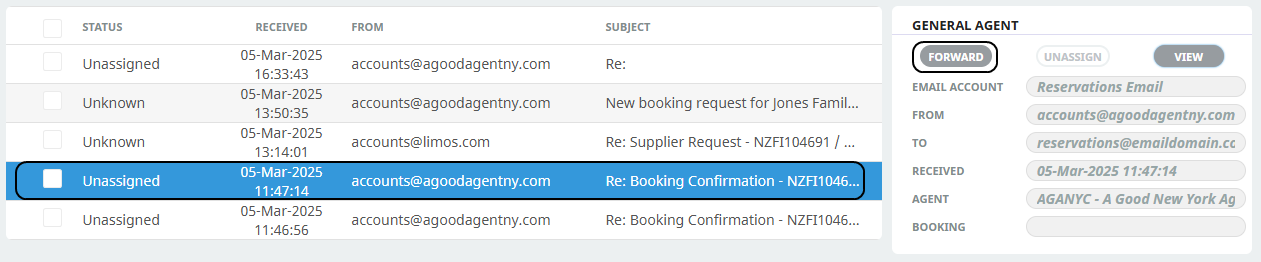
Highlight the Email and selectForward.
-
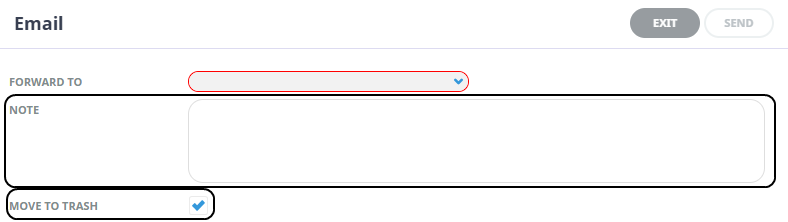
In theNote field, insert a message to the email recipient, by default the Move to Trash checkbox is ticked, to keep the email deselect the checkbox.
-
A confirmation dialog displays. Forwarding this email will remove it from any Booking/Supplier/Agent Select Yes to confirm, or No to return to the Inbox.
-
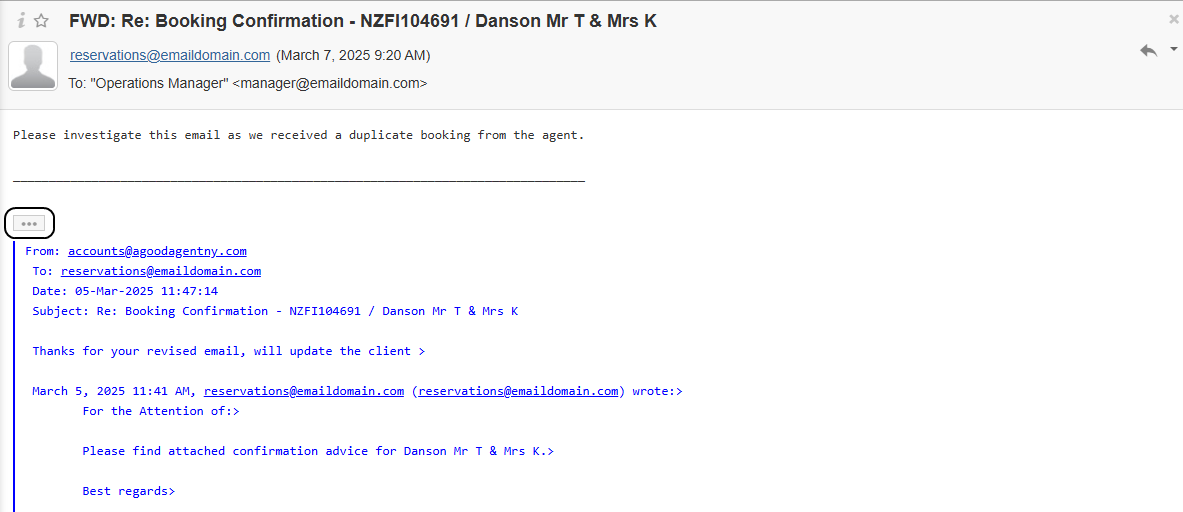
The email is received in therecipients email account, the recipient can view the contents of the original email, by clicking the ellipsis.
About Email Management Fields
Email Filter
Emails can be viewed and updated in bulk by selecting the required filters. Below are the filter selections available when using the Email Management feature. This provides a convenient solution to processing unassigned emails or moving received emails to the Trash menu.
Email Account
This selection filters emails by an available email account.
Date From & To
The date the email was imported into Tourplan. If selection for a range of dates is entered, Emails that fall within the date range provided will be display in the Email list.
Agent
When a specific Agent is selected, a list of emails is returned for that Agent only.
Supplier
When a specific Supplier is selected, a list of emails is returned for that Supplier only.
Booking Ref
When a booking reference is defined, a list of emails is returned for that booking only.
Email Type
Filters by Email Type can be applied, the Email Type options are as follows:
-
All - All Emails
-
Booking Agent - Booking and Agent
-
Booking Supplier - Booking and Supplier
-
Agent Email - Agent Emails Only
-
Supplier Email - Supplier Emails Only
-
General - Not linked to an Agent, Supplier or Booking
Email Status
By default, Error and Unassigned are selected however these can be changed by clicking on the required check boxes.
-
All - displays all emails
-
Assigned - displays assigned emails
-
Error - displays error emails
-
Unassigned - displays unassigned emails
One or more selections is required to filter the email list.
About View Email Fields
Administrators view the content of the email message by highlighting an email in the list and selecting 'View'. From here emails can be assigned to bookings, agents, and/or suppliers. Emails can also be forwarded elsewhere or moved as unwanted emails to the Trash bin.
From the Email 'View' screen.
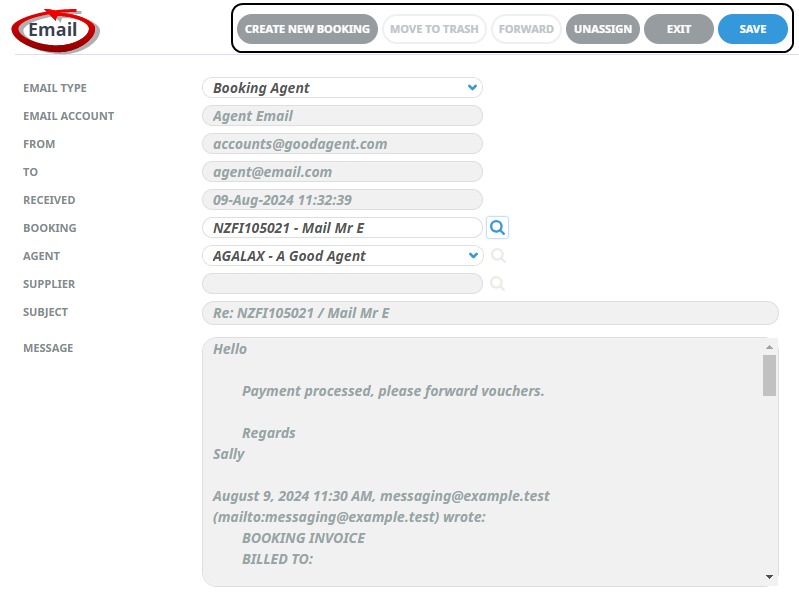
Buttons
Create New Booking - New Bookings can be created.
Move to Trash - Email messages can be moved to Trash.
Forward - Email messages can be forwarded to an external email account.
Unassign - Assigned email messages can be unassigned from the Booking, Agent or Supplier.
Exit - Closes the Email view.
Save - Saves the changes.
Email Type
The email type selected enables different field selections and search functions.
- Booking - Enables the Booking field, allowing users to search for the required booking to assign the email to
-
Booking Agent - Enables the Booking field, allowing users to search for the required booking to assign the email to. The Agent field populates from the attached booking agent.
-
Booking Supplier - Enables the Booking field, allowing users to search for the required booking to assign the email to. The Supplier field populates a dropdown list of suppliers from the attached booking.
-
General - Provides the ability to move the email to the Trash bin.
-
Agent Email - Enables the Agent field, allowing users to search for the required debtor to assign the email to.
-
Supplier Email - Enables the Supplier field, allowing users to search for the required creditor to assign the email to.
About Forward Email Fields
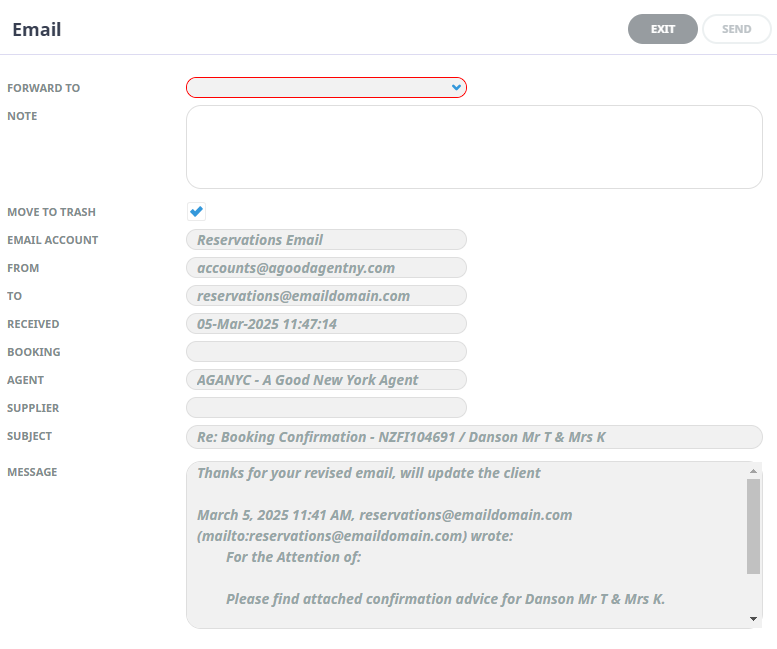
Forward To - A dropdown selection of available email address to forward to.
NOTE: A list of approved email accounts to forward emails to are pre-defined in the Code Setup, Email Account configuration. If no email accounts are listed, the Forward To dropdown in Email Management will be empty. For more information on the setup see Insert Button (Forward Email)
Note - A free format field to enter a message to the recipient of the forwarded email.
Move to Trash - By default this checkbox is selected, allowing simultaneous forwarding of the email and moving the email to the trash bin. Users can deselect to keep the email in the Inbox.
Remaining Fields - The content of the original email is visible onscreen as read only.
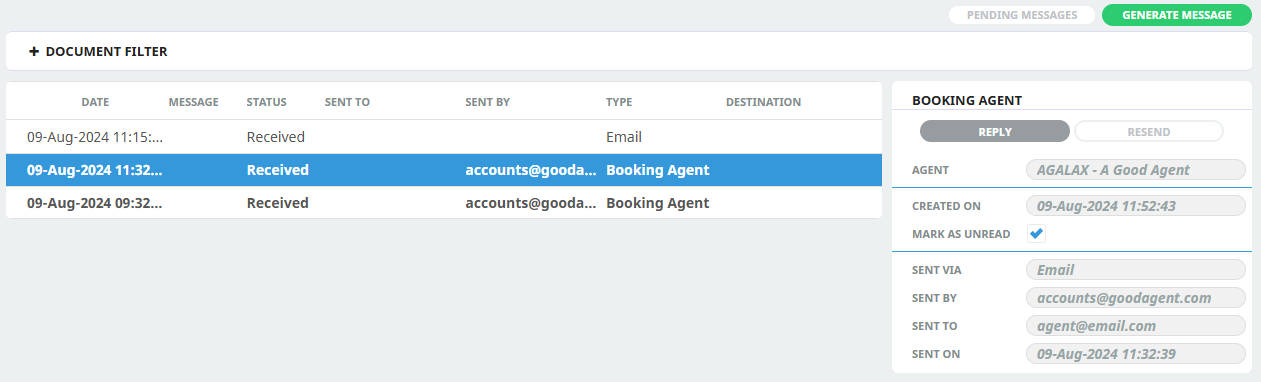
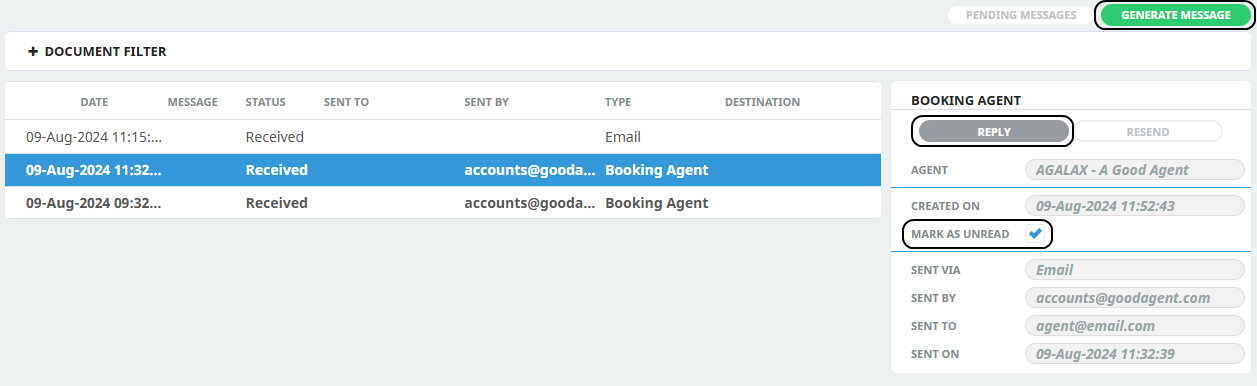
Replying to Emails
Imported emails are replied to from within the Documentation page of the Booking, Agent or Supplier.
Consultants View - Open Booking
- Open FITs, search for the Booking. The received (now assigned) email displays when Operations & Accounts > Documentation Menu is selected.
-
NOTE: Agent or Supplier emails are available from the Documentation menu when in the Debtor or Creditor applications.
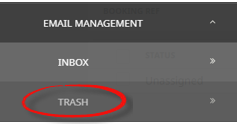
Trash
Imported emails are not deleted in Tourplan they are moved from the Inbox to a Trash menu. They appear in the Trash list where the email content can be viewed, or the email can be restored back into the Inbox.
View an email in Trash
-
From the Home menu, selectHome > Operations > Booking Operations > Email Management > Trash.
- Click the Home Menu to expand it:
- Click the Operations menu option to expand it:
- Click Booking Operations menu option to expand it:
- Click Email Management to open the Email Management screen:
- Click Trash to open the Email Trash screen:

- Click the Home Menu to expand it:
-
A list of emails displays. Expand theEmail Filter to filter emails by Email Account, Date, Agent, Supplier, Booking Reference, or Email Type.
-
Highlight the email line, and selectView.

-
ClickExit to close.
Restore email back to the Inbox
-
From the Home menu, selectHome > Operations > Booking Operations > Email Management > Trash.
- Click the Home Menu to expand it:
- Click the Operations menu option to expand it:
- Click Booking Operations menu option to expand it:
- Click Email Management to open the Email Management screen:
- Click Trash to open the Email Trash screen:
- Click the Home Menu to expand it:
-
A list of emails displays. Expand theEmail Filter to filter emails by Email Account, Date, Agent, Supplier, Booking Reference, Email Type.
-
Check the box next to the Email(s) and selectRestore.
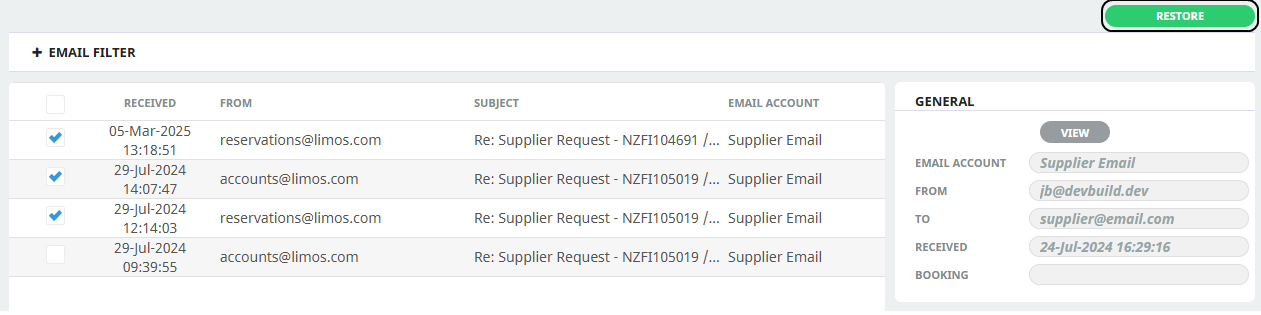
-
The emails are moved to the Inbox.